


How to Replace a Bathtub Drain in 2026?

A leaking or slow bathtub drain can turn a small plumbing problem into stained flooring, musty odors, and costly water damage. In 2026, many homeowners still choose to handle a Bathtub Drain Replacement themselves. The task looks simple, but hidden corrosion, tight fittings, and brittle seals can complicate the job.

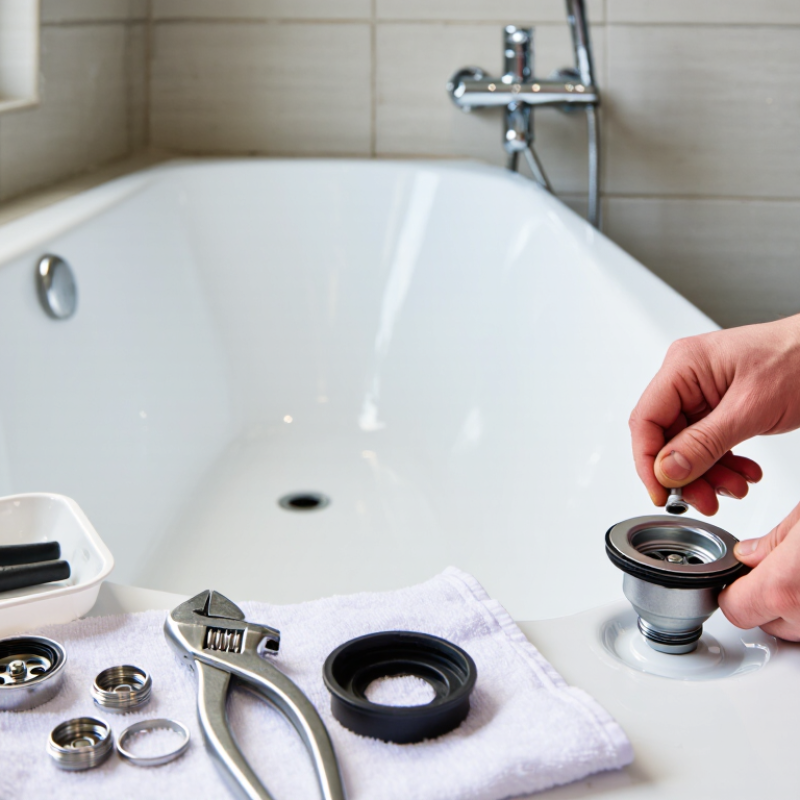
This guide explains how to replace a bathtub drain with practical steps and professional standards. You will learn how to identify the drain type, gather suitable tools, remove the old assembly, and install a watertight replacement. A drain wrench, adjustable pliers, plumber’s putty, and a replacement gasket are commonly required. Check the new drain’s size before opening the package.

Work slowly around the tub surface. Scratches near the drain are surprisingly easy to create. Protect the enamel with a soft cloth, and keep small parts in a tray. Turn off nearby water access when necessary, even though this repair usually involves only the drain opening. Inspect the overflow area as well.

Experienced plumbers know that the visible leak is not always the real source. Water may travel along damaged threads or a poorly seated gasket. Testing with several full tubs of water gives better evidence than a quick splash. It is also worth admitting that some older drains resist removal completely. If the fitting is severely corroded or the tub shifts, professional help may prevent greater damage. A careful repair is better than a rushed success.
How to Replace a Bathtub Drain in 2026?

Tools and Materials for Replacing a Bathtub Drain

How to Replace a Bathtub Drain in 2026?

Replacing a bathtub drain begins with the right tools, not force. You will need a drain wrench, adjustable pliers, screwdrivers, a utility knife, a bucket, gloves, and a bright flashlight. Keep a rag nearby. Old drains often release dark sludge and sharp mineral flakes. A replacement drain flange, rubber gasket, and compatible sealant are also essential. Check the drain size before purchasing anything. Measuring twice is cheaper than reopening the tub.

The Joint Center for Housing Studies reported that U.S. homeowner improvement spending reached about 472 billion dollars in 2022. That figure shows why careful repair skills matter in household maintenance.

Remove the stopper, then fit the drain wrench into the crossbars. Turn slowly counterclockwise. If the crossbars are corroded, they may break. I still underestimate that risk sometimes. Never grip the visible flange with aggressive pliers; scratched surfaces can leak later.

Clean the drain opening completely before installing the new assembly. A plastic scraper, rag, and mild household cleaner usually remove old sealant. Apply plumber’s putty only when the drain instructions permit it. Some assemblies require silicone instead.

Tighten the flange firmly, but avoid crushing the gasket. The U.S. Environmental Protection Agency recommends checking plumbing components for proper installation and leak prevention through its WaterSense guidance.

After installation, run water for several minutes and inspect below the tub. A dry first test does not prove long-term success. Recheck the connection the next day.

How to Remove the Existing Bathtub Drain Safely

Removing an old bathtub drain safely begins with a dry, stable work area. The CDC reports over 200,000 bathroom-related injuries receive emergency treatment each year. Slippery surfaces deserve respect. Place a rubber mat outside the tub, wear cut-resistant gloves, and use eye protection. Cover the tub floor with a folded towel, but keep the drain opening visible. Remove the stopper, then collect loose screws in a small container.

Use a drain wrench that fits the crossbars inside the flange. Turn counterclockwise with steady pressure. A flashlight helps reveal corrosion, broken bars, or standing water. Apply penetrating oil sparingly, then wait according to its instructions. Do not hammer the flange. Excessive force can twist the waste shoe below the tub, damaging the trap or causing a hidden leak. CPSC NEISS injury surveillance repeatedly identifies bathrooms as common locations for fall injuries, so kneeling carefully matters too.

In hands-on repairs, patience prevents expensive mistakes. I have sometimes focused on turning the flange and ignored movement beneath the tub. That was poor judgment. Ask another person to watch the drain assembly below, if access exists. Stop immediately if the pipe rotates, the tub flexes, or the metal begins to crack. An older flange may need careful cutting with a compact hacksaw, keeping the blade shallow. Never cut blindly through the surrounding tub surface. A bucket and absorbent cloth should remain nearby for trapped water and debris. Test the exposed fitting gently before installing anything new.

How to Prepare the Drain Opening and Install the New Drain

How to Replace a Bathtub Drain in 2026?

Before installing the new drain, remove the stopper and loosen the old drain flange with a drain wrench. Protect the tub surface with a folded towel. Scrape away every trace of old sealant around the opening. Use a plastic scraper, not a sharp metal blade. Wipe the area with a clean cloth and let it dry completely. Check the drain opening for cracks, rust, or damaged threads. Small defects can prevent a reliable seal. I once rushed this inspection and had to remove the fitting again. That wasted time.

Test-fit the new drain without sealant. It should sit flat and turn smoothly into the existing pipe. Apply a continuous, even ring of plumber’s putty beneath the flange, unless the fitting instructions require another sealant. Press the flange into place by hand. From below, position the gasket and tightening nut carefully. Hold the flange steady while tightening the nut with a wrench. Stop when it feels firmly seated. Over-tightening may distort the gasket or damage the tub.

Remove squeezed-out putty with a damp cloth. Reinstall the stopper and pour water slowly into the tub. Watch underneath for several minutes. Then fill the tub slightly and release the water. Check the connection again. A dry surface matters. If the drain still leaks, do not hide the problem with extra sealant. Remove it, inspect the gasket alignment, and repeat the installation carefully.

How to Reconnect the Plumbing and Seal Every Joint

Replacing a bathtub drain is mostly a reconnection job. The visible flange gets attention, but hidden joints cause callbacks. EPA WaterSense estimates household leaks waste nearly 10,000 gallons yearly. Nationally, leaks waste nearly one trillion gallons. (EPA WaterSense, Fix a Leak Week materials, 2024.) After removing old hardware, clean the tub opening and inspect the waste-and-overflow body. The drain shoe, rubber gasket, and overflow gasket must sit squarely. A tilted gasket can leak behind the wall. Keep it simple.

Apply suitable plumber’s putty or sealant beneath the flange, following the tub material’s instructions. From below, tighten the flange without crushing the gasket. Reconnect the overflow pipe, drain elbow, and trap with new washers. Compression nuts need even pressure, not brute force. Use solvent cement only on compatible plastic joints. Use thread sealant only where required. Do not tape compression threads. I once trusted a dry-looking joint too quickly. It failed after the first hot bath.

Set the trap with a slight fall toward the building drain. Avoid strain on the tub assembly. Support long sections so movement cannot loosen seals. Fill the tub halfway, release it, and inspect every joint with dry tissue. Then test the overflow separately. Wait, then check again. The International Residential Code and IAPMO plumbing guidance emphasize leak-free drainage connections, but local code controls the installation. If water appears, stop, realign the joint, replace the washer, and retest. EPA WaterSense also links prompt leak repair with lower water waste.

How to Replace a Bathtub Drain in 2026?

Reconnecting the Plumbing and Sealing Every Joint

The chart shows practical inspection and sealing checkpoints for a typical 1½-inch bathtub drain assembly. Confirm that each threaded connection is tight, verify the slip-joint washers are correctly seated, and perform a leak test before closing the access area. Allow the sealant to cure according to its product instructions.

How to Test the New Bathtub Drain for Leaks

After replacing a bathtub drain, wipe the surrounding surface completely dry. A damp rim can hide a slow leak. Place a bright towel beneath the trap and drain connection. This makes fresh water easier to spot.

Fill the tub with several inches of water, then wait five minutes. Do not rely on the stopper alone. Watch the underside while the water remains still. Look for beads forming around the drain flange, rubber gasket, or threaded connection. Next, release the stopper and inspect the trap as water flows. A dry joint is a good sign. It is not proof yet. Run another test with warmer water, because materials can expand slightly.

I once treated a barely damp towel as condensation. That was a mistake. A leak may appear only after repeated draining. Check the ceiling below, if accessible, for a new stain or soft patch. Use a dry tissue around each joint; even a small wet mark matters. If water continues after tightening the connection gently, remove and reseat the seal rather than forcing it. Overtightening can distort the gasket or damage the tub surface. Keep the area visible for several hours, and test the overflow opening separately by filling the tub near its normal level. Follow local plumbing requirements, and consult a qualified plumber when the leak is inside a concealed wall.